Register of Attendance

Top  Previous  Next

Register of Attendance


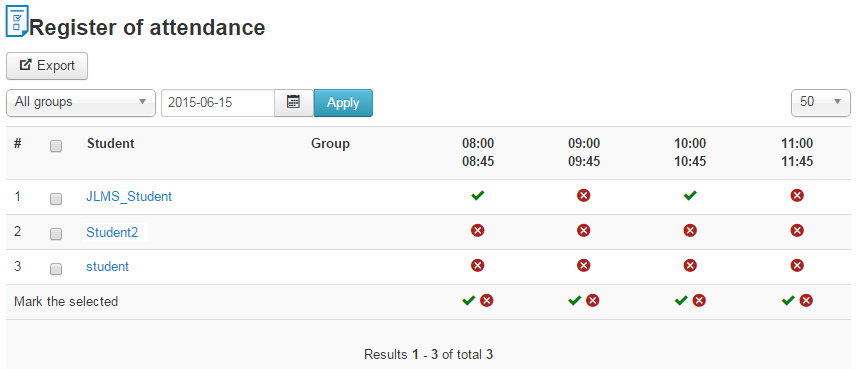
The Register of Attendance section allows the user to mark the attendance for Students taking part in the course. All Students are listed in the table where every person is registered as attending the course hours of the current date or not. Every course hour is presented as a separate column in the table; under every column there are two icons: Attended () and Not attended () that are used for setting the data.


Fig. Register of Attendance


The home page of this section proposes a table of attendance for the current date. The user can pass to other dates by selecting the necessary day in the calendar. To browse a date, select the necessary date in the Calendar () and click the Apply button.


Students' attendance can be marked in two ways:


By groups: to register attendance of a group of Students, select check boxes next to the necessary entries in the list and click the Attended () icon under the corresponding course hour.
Individually: to register attendance for one Student, click the Not attended icon () for the corresponding course hour right in the table. As a result, it will change for Attended (publish).


Tip: To provide better viewing representation, you can sort out the list of Students using the filters at the top of the page:

By the number of entries in the list (the Display# field);
By group to which Students belong.


Viewing Statistics


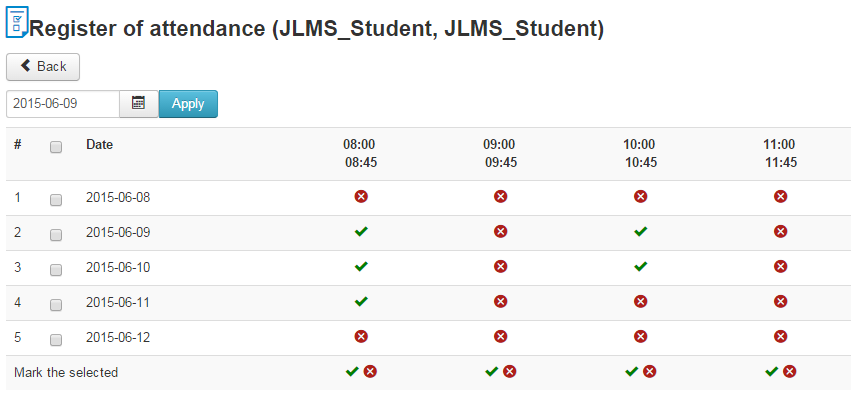
To view the statistics of attendance for a Student, click his/her name in the list on the home page of the Register of Attendance section:


Fig. Statistics of Attendance


The statistics page represents the data for 5 days starting from the current one. To pass to some other date, select a necessary date in the Calendar () and click the Apply button.


Exporting Attendance Statistics


The system allows exporting statistics on Students' attendance into an Excel file that can be stored externally.


To export statistics:


1.Click the Export () icon above the list.


Fig. ‘Exporting Attendance Statistics’


2.In the Select a period field select the start date and end date of the time span for which you would like to get statistics.
3.From the Select a user list select Students for whom you would like to get statistics (you can sort the membership in the list with the help of the Group field under the Select a user field).
4.Click the Export button. As a result, you will be offered to open or save a configured Excel file with the statistics data.


If you have any questions or suggestions regarding our help documentation, please post them to our ticket system.