|
The Learning Paths section allows the user to create educational lines in the studying process. To pass to this section, click the corresponding icon ( ) in the left course menu. ) in the left course menu.
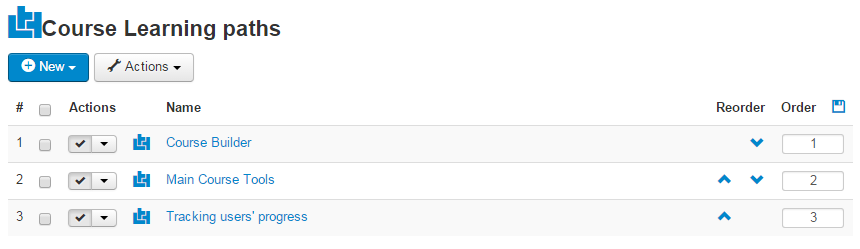
Fig. 'Course Learning paths'
A Learning Path represents a sequence of steps that all Students taking part in a course should complete. The steps of a Learning path may be of various nature: these can be different documents a Student should process, educational links a user should view, or quizzes a Student should complete.
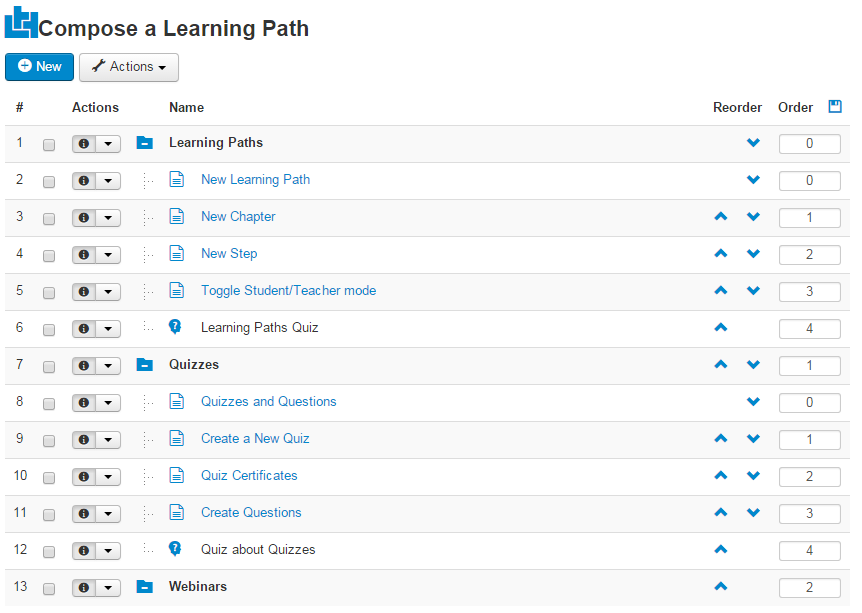
Fig. ‘Learning Path Step Tree’
A learning path has a tree-like structure: it may contain a number of chapters, each of which may contain child elements - documents, links and quizzes. It's possible to add SCORM packages as learning path steps too. Passing to the next stage of a learning path may be conditioned by completing the previous chapters of the path. In this way, the Teacher of a course can make sure that Students process the materials of the course thoroughly, not skipping any of its stages.
A user can add learning paths in two ways:
| • | Create a JoomlaLMS learning path; |
| • | Upload a SCORM and LMS compliant course content. |
The Learning Paths page also gives the user a possibility to edit, publish and delete learning paths.
To manage Learning Paths in the list, use Actions button ( ) at the top of the list. ) at the top of the list.
Creating JoomlaLMS Learning Paths
|
To make up a learning path, you should add a new learning path and configure it. The next steps should be followed:
Step 1: Creating a learning path
|
| 1. | Enter the course Learning Paths section () and click the New learning path ( ) button at the top of the list. ) button at the top of the list. |
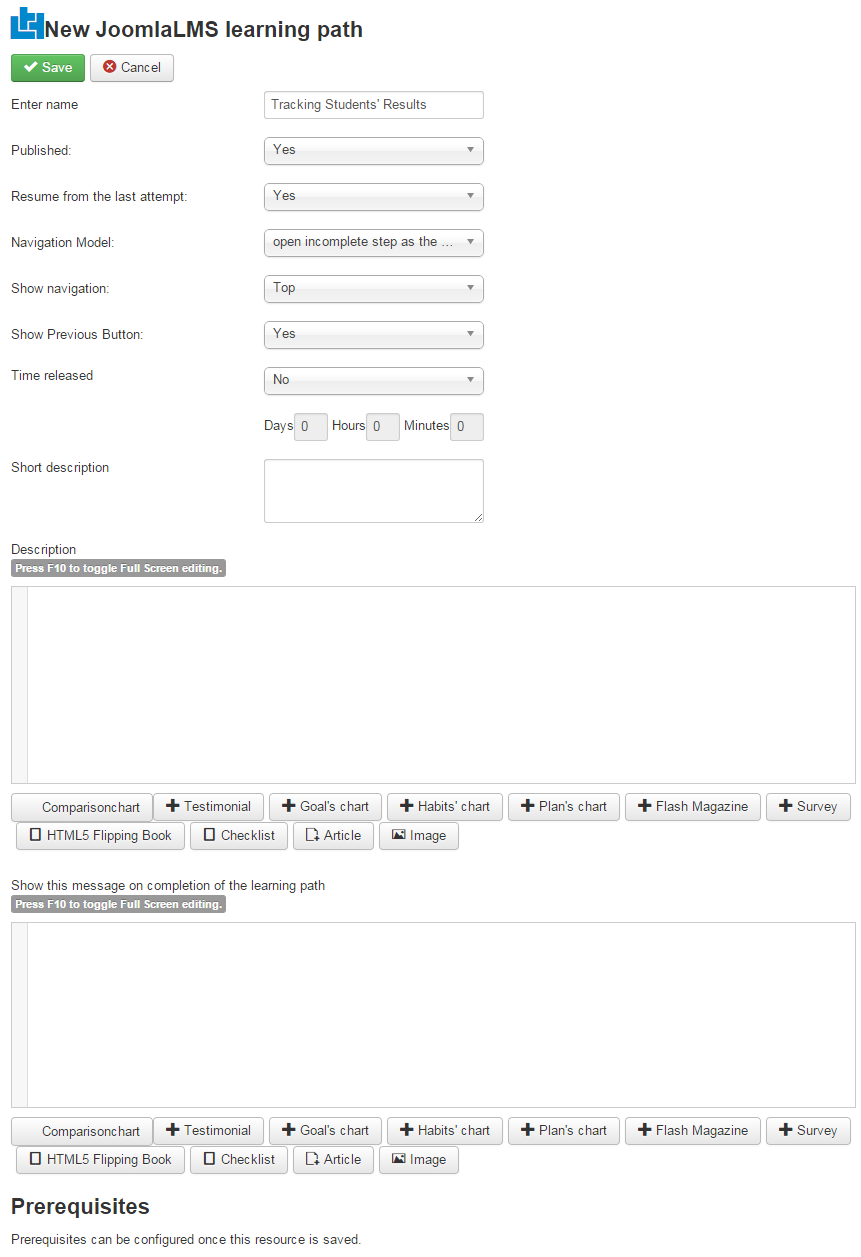
Fig. ‘Creating Learning Path Step I’
| 2. | Enter a title for the new learning path. |
| 3. | If you want to add a forum board for the discussion of the created learning path check the Yes box, otherwise leave the No box checked. |
| 4. | If you want the learning path to resume not from the very beginning but from last attempt check the Yes box otherwise leave the No box checked. |
| 5. | Select the navigation model for the learning path: either the following or the next incomplete step can be opened as the next step. |
| 6. | If you want the navigation menu to be shown, select the position for it: either Top or Left, otherwise select Hide. |
| 7. | If you want the Previous button to be shown in the learning path, select Yes for this option, otherwise select No. |
| 8. | If you wish this learning path to become published in a certain period after a student's enrollment you can use the 'time released' feature to determine a period after which the learning path will be published. Check Yes if you wish to enable this feature, otherwise check No. Enter the necessary time period in days, hours and minutes. |
| 9. | Enter the description and short description for the new learning path. You may as well enter a message that will be shown to the student on the completion of the learning path. Use the embedded Visual Editor to format the description text. |
| 10. | When finished, click Save ( ) button in the top left corner of the form to add a learning path; click Cancel ( ) button in the top left corner of the form to add a learning path; click Cancel ( ) button to discard changes and close the form. Once the learning path is saved you can configure its prerequisites. Prerequisites are other learning paths that a student must complete before moving on to this one. The available learning paths are listed in the left box. Anytime you edit a learning path you can change its prerequisites - add a new one and delete the existing ones. ) button to discard changes and close the form. Once the learning path is saved you can configure its prerequisites. Prerequisites are other learning paths that a student must complete before moving on to this one. The available learning paths are listed in the left box. Anytime you edit a learning path you can change its prerequisites - add a new one and delete the existing ones. |
Step 2. Creating path chapters
|
| 1. | On the Course Learning paths page click the name of a newly created path. |
| 2. | Click the New () button at the top of the page. |
| 3. | Select 'Chapter' tab to add a new chapter to the created path. |
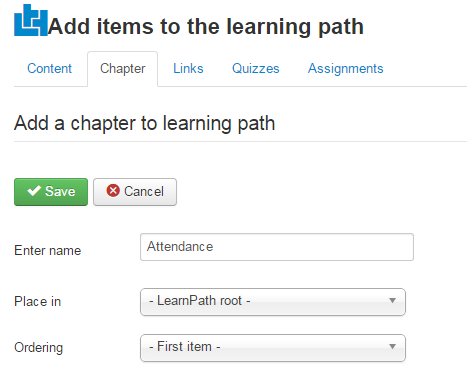
Fig. ‘Creating Learning Path Step II’
| 4. | Enter the name for the new chapter. Short description and description can be added after the chapter is created. Use the embedded Visual Editor to format the description text. |
| 5. | In the Place in field specify to which node of the learning path tree the chapter should belong. |
| 6. | When finished, click Save () button in the top left corner of the form to add a chapter; click Cancel () button to discard changes and close the form. |
Every chapter of a learning path should be filled with steps for Students to pass.
| 1. | On the Course Learning paths page click the name of the created path. |
| 2. | On the Learning path page click the Add Step icon ( ) next to the corresponding chapter. ) next to the corresponding chapter. |
| 3. | Select documents for the chapter. |
| • | Click the 'Documents' tab and select check boxes next to the documents you would like to place to the chapter. |
| • | In the Place in field specify to which node of the learning path tree the documents should be placed. |
| • | In the Ordering field specify the position of the documents in the tree. Please note that if you select more than one document, they will be placed to the tree in the alphabetical order. |
| 4. | Select links for the chapter. |
| • | Click the 'Links' tab and select check boxes next to the links you would like to place to the chapter. |
| • | In the Place in field specify to which node of the learning path tree the links should belong. |
| • | In the Ordering field specify the position of the links in the tree. Please note that if you select more than one link, they will be placed to the tree in the alphabetical order. |
| 5. | Select quizzes for the chapter. |
| • | Click the 'Quizzes' tab and select check boxes next to the quizzes you would like to place to the chapter. |
| • | In the Place in field specify to which node of the learning path tree the quizzes should belong. |
| • | In the Ordering field specify the position of the quizzes in the tree. Please note that if you select more than one quiz, they will be placed to the tree in the alphabetical order. |
| 6. | Select SCORMs for the chapter. Once you've added a SCORM you don't want it to be visible on the Learning paths page, for it's assigned in order for student to open it when he passes the Learning path. To make it invisible choose a necessary option when uploading or editing a SCORM. |
| • | Click the 'SCORMs' tab and select check boxes next to the SCORMs you would like to place to the chapter. |
| • | In the Place in field specify to which node of the learning path tree the SCORMs should belong. |
| • | In the Ordering field specify the position of the SCORMs in the tree. Please note that if you select more than one SCORM, they will be placed to the tree in the alphabetical order. |
| 7. | Add a new sub-chapter for the chapter (if necessary). |
| • | Click the 'Chapter' tab and in the Enter name field of the Add a chapter to learning path section enter the name of a new sub-chapter. |
| • | In the Place in field specify to which node of the learning path tree the sub-chapter should belong. |
| • | In the Ordering field specify the position of the sub-chapter in the tree. |
| 8. | Create a content page for the learning path chapters. |
| • | Click the 'Content' tab and in the Enter name field of the Create content page in the learning path section enter the name of the content page. |
| • | In the Place in field specify to which node of the learning path tree the content page should belong. |
| • | In the Ordering field specify the position of the content page in the tree. |
| • | In the Short description and Description fields enter the short representation and description for the new content page. Use the embedded Visual Editor to format the description text. |
| 9. | When finished, click Save () button in the top left corner of the form to add a step; click Cancel () button to discard changes and close the form. |
Step 4. Specifying pre-requisites
|
| 1. | On the Course Learning paths page click the name of the created path. |
| 2. | On the Learning path page click the Edit Conditions ( ) next to the corresponding step (for example, Chapter II). ) next to the corresponding step (for example, Chapter II). |
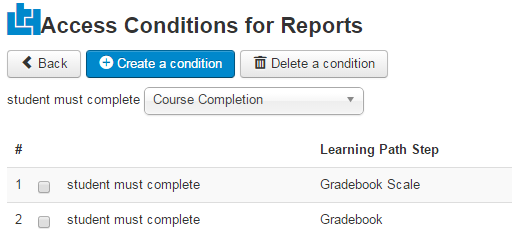
Fig. ‘Creating Learning Path Step IV’
| 3. | From the student must complete list select a step that should be completed before a Student will be able to pass to the current step (for example, Chapter I). |
| 4. | Click the Create a condition button above it. |
| 5. | If necessary, repeat the procedure to set a required number of conditions. |
| 6. | Click the Back button ( ) to get back to the learning path tree. ) to get back to the learning path tree. |
In some cases it may be necessary to modify the data of a created Learning path.
To edit an already configured learning path:
| 1. | On the Course learning paths page select a check box next to the corresponding path. |
| 2. | Click the Edit ( ) button. ) button. |
| 3. | Modify learning path properties as described in the Creating JoomlaLMS Learning Paths section. |
| 4. | When finished, click Save () button in the top left corner of the form save changes; click Cancel () button to discard changes and close the form. |
If you have any questions or suggestions regarding our help documentation, please post them to our ticket system.
|