|
The Gradebook is a tool that helps the Teacher to assess Students’ activity in various aspects of the learning process. However before you start putting marks to your Students, you should do the following:
| 1. | Define your own grade scale for each course; |
| 2. | Define the fields of activity for which grades should be put; |
| 3. | Create certificates that could be granted to course Students. |
Working with Grade Scales
|
The system allows the Teachers to create their own system of grades for each course. To create a gradebook scale:
| 1. | Enter the necessary course and click the Gradebook icon ( ) in the left course menu. A list of course Students with their grades will appear. ) in the left course menu. A list of course Students with their grades will appear. |
| 2. | At the top of the list open the Gradebook scale tab ( ) to show gradebook scale items: ) to show gradebook scale items: |
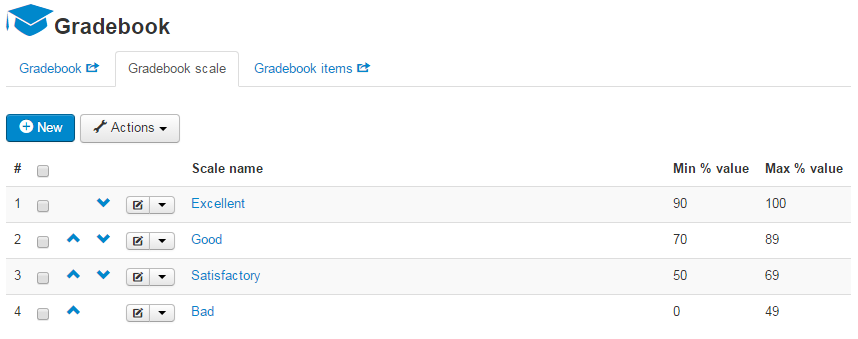
Fig. ‘Gradebook Scale’
The gradebook scale is represented as a number of items that split the scale into grades (each grade basically represents a certain percentage range, for example, 100%-90% stands for the highest grade, 89%-70% stands for the good grade, etc.).
Use the icons next to scale items to edit or delete them.
To move grades in the list, use the Move Up ( ) and Move Down ( ) and Move Down ( ) icons. ) icons.
Adding Grades to the Scale
|
When you add new grades to the scale, you actually split it into a number of ranges. The ranges are expressed in percents, for example:
Each grade has its own name that will be visible to Students (for example, Excellent or A).
Note: When working with grades, make sure that their inherent ranges do not overlap, otherwise there may occur confusion with those grades that are put automatically (for example, for quizzes).
|
To add a new grade:
| 1. | Enter the necessary course and click the Gradebook icon () in the left course menu. A list of course Students with their grades will appear. |
| 2. | At the top of the list open the Gradebook scale tab () to show gradebook scale items. |
| 3. | Click New ( ) button at the top of the list to display the following form: ) button at the top of the list to display the following form: |
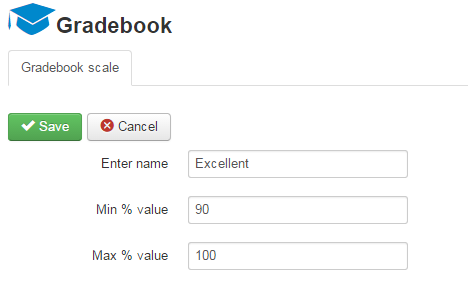
Fig. ‘Adding a New Grade’
| 4. | Fill in the following form fields: |
• In the Enter name field specify the name of the grade as it will be shown to Students (the name should be longer than 10 characters),
• In the Min % value and Max % value fields set the minimum and the maximum percentage limits for the grade.
| 5. | When finished, click Save ( ) button in the top left corner of the form to save the grade; click Cancel ( ) button in the top left corner of the form to save the grade; click Cancel ( ) to discard changes and close the form. ) to discard changes and close the form. |
To edit grades which were created earlier:
| 1. | Enter the necessary course and click the Gradebook icon () in the left coursemenu. A list of course Students with their grades will appear. |
| 2. | At the top of the list open the Gradebook scale tab () to show gradebook scale items. |
| 3. | Select a check box next to the grade that you want to modify and click the Edit gradebook scale icon ( ) next to the item name. ) next to the item name. |
| 4. | Modify grade properties as described in the Adding Grades to the Scale topic. |
Working with Gradebook Items
|
Activity of your Students can be assessed from various angles: grades can be put for homework tasks, tests, exams, etc. The Gradebook Items section helps you to define and create those aspects of the learning process that should be assessed in the gradebook. A Gradebook Item is an aspect (or a field of activity) for which Students can get a certain grade.
To work with gradebook items:
| 1. | Enter the necessary course and click the Gradebook icon () in the left course menu. A list of course Students with their grades will appear. |
| 2. | At the top of the list open the Gradebook items tab () to show the list of items that can be assessed by the Teacher: |
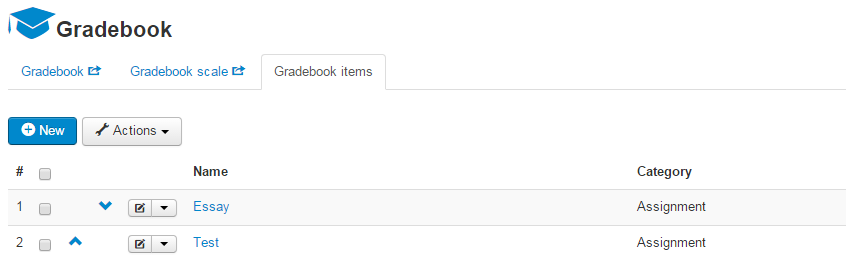
Fig. ‘List of Gradebook Items’
- Use the icons next to gradebook items to edit or delete them.
- To move items in the list, use the Move Up () and Move Down () icons.
To create a field or aspect of the learning process that can be assessed by the Teacher in the gradebook:
| 1. | Enter the necessary course and click the Gradebook icon () in the left course menu. A list of course Students with their grades will appear. |
| 2. | At the top of the list open the Gradebook items tab () to show the list of items that can be assessed by the Teacher. |
| 3. | Click the New () button at the bottom of the list to display the following form: |
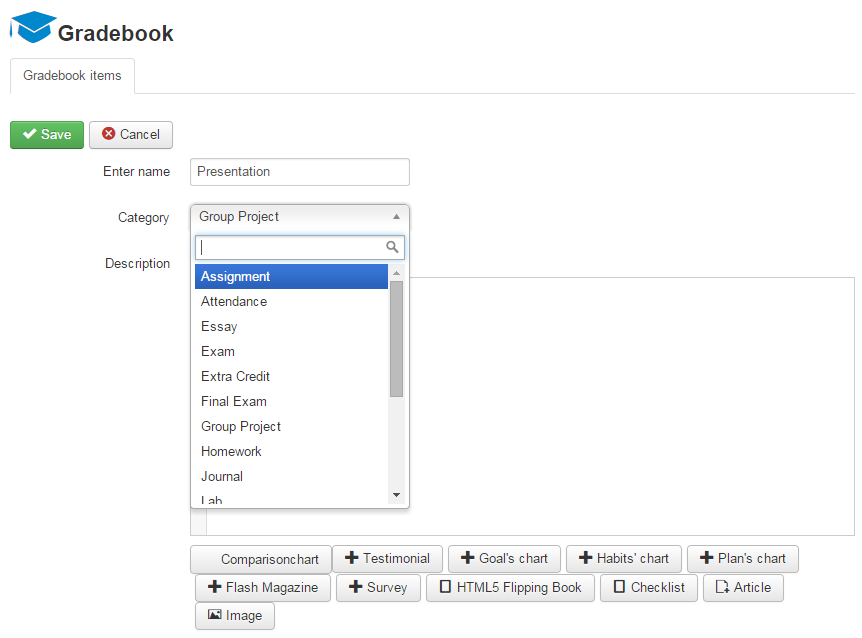
Fig. Creating a New Gradebook Item
| 4. | Fill in the following form fields: |
| • | In the Enter name field specify the name of the gradebook item; |
| • | From the Category list select a category to which the item will belong; |
| • | In the Description field enter any description or comment text that will characterize the item. Use the embedded Visual Editor to format the text. |
| 5. | When finished, click Save () button in the top left corner of the form to save the grade; click Cancel ( ) to discard changes and close the form. ) to discard changes and close the form. |
To edit a gradebook item that was created earlier:
| 1. | Enter the necessary course and click the Gradebook icon () in the left course menu. A list of course Students with their grades will appear. |
| 2. | At the top of the list open the Gradebook items tab () to show the list of items that can be assessed by the Teacher. |
| 3. | Select a check box next to the item that you want to modify and click the Edit icon () next to its name. |
| 4. | Modify gradebook item properties as described in the Creating Gradebook Items section. |
The Teacher can create a certificate that can be downloaded later on through the Gradebook section by course Students. Note that you can add only one certificate in this section.
To create a gradebook certificate:
| 1. | Enter the necessary course and click the Gradebook icon () in the left course menu. A list of course Students with their grades will appear. |
| 2. | At the top of the list click Configure > Course certificate ( ) to display the Course Certificate form. ) to display the Course Certificate form. |
| 5. | Navigate back to the Gradebook page and click the ( ) or ( ) or ( ) in the Course Completion column to define what Students should be able (unable) to download certificates. ) in the Course Completion column to define what Students should be able (unable) to download certificates. |
Gradebook: Putting Grades
|
After you have defined the gradebook scale and created the list of gradebook items, you can start putting grades to your Students. Students’ gradebooks contain grades for gradebook items and quizzes. The Teacher can put grades for gradebook items only; grades for quizzes are put automatically when the quiz is completed.
To work with Students’ grades, enter the necessary course and click the Gradebook icon () in the left course menu. A list of course Students with their grades will appear:
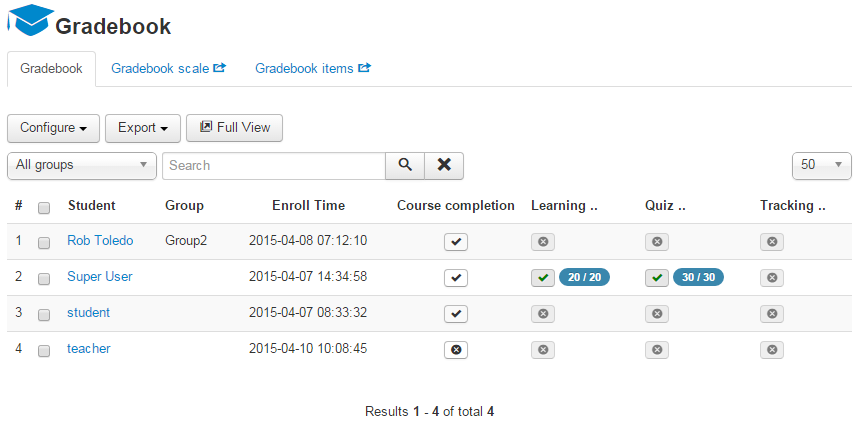
Fig. ‘Gradebook’
The gradebook represents a list of your Students with grades put for SCORM packages, quizzes and gradebook items.
| • | To view or manage grades of a certain Student, click Student's name link. |
| • | To allow (prohibit) a Student to download a course certificate, use the () or () icons in the Course Completion column. |
Use the buttons at the top of the list to perform the following operations:
| • | Create course certificate - click the Configure > Course certificate to add a certificate that can be granted to Students. |
| • | Configure the course completion - click the Configure > Course completion to create a configuration of course completion. |
| • | Export to CSV - click Export > CSV to export the gradebook data in CSV format. |
| • | Export to XLS - click Export > XLS to export the gradebook data in XLS format. |
Tip: To provide better viewing representation, you can sort out the list of Students. Use the Display # list at the top of the page to define how many Students’ records should be shown per page.
|
Managing Student's Grades
|
To manage grades of a certain Student:
| 1. | Enter the necessary course and click the Gradebook icon () in the left course menu. |
| 2. | From the gradebook list choose the necessary Student and click their name link. The system will display a page with quiz and gradebook results: |
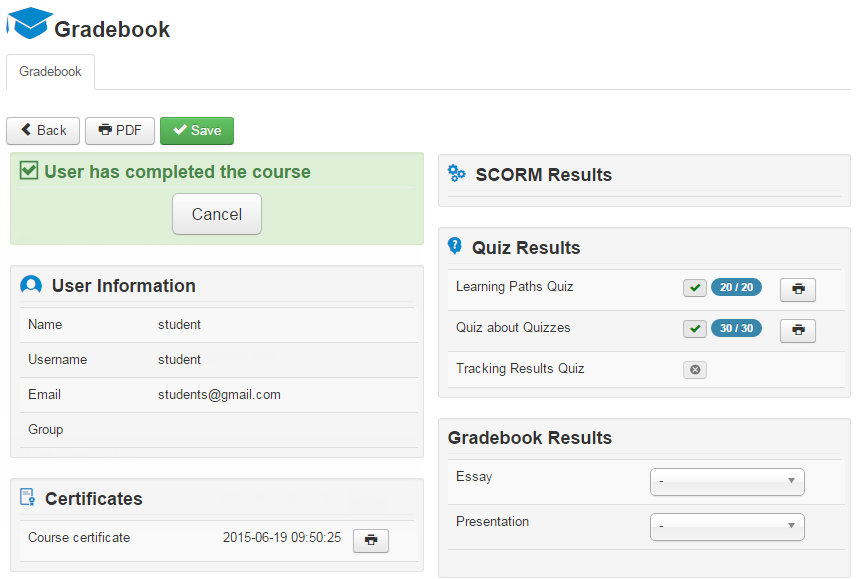
Fig. 'Student's Gradebook'
| 3. | Use the drop-down lists in the Gradebook Results section to put grades for various aspects of the learning process. |
| 4. | To export the gradebook data of this student in PDF format click PDF button ( ) in the top right corner. ) in the top right corner. |
| 5. | When finished, click Save () button in the top left corner of the form to save the grade; click Cancel () to discard changes and close the form. |
Configuring the automatic course completion
|
This option allows Teachers to create something like an academic curriculum consisting of learning paths and SCORMs list which are obligatory to study in order for the course to be marked as complete automatically.
To configure the course completion:
| 1. | Enter the necessary course and click the Gradebook icon () in the left course menu. A list of course Students with their grades will appear. |
| 2. | At the top of the list click Configure > Course completion ( ) to open the form: ) to open the form: |
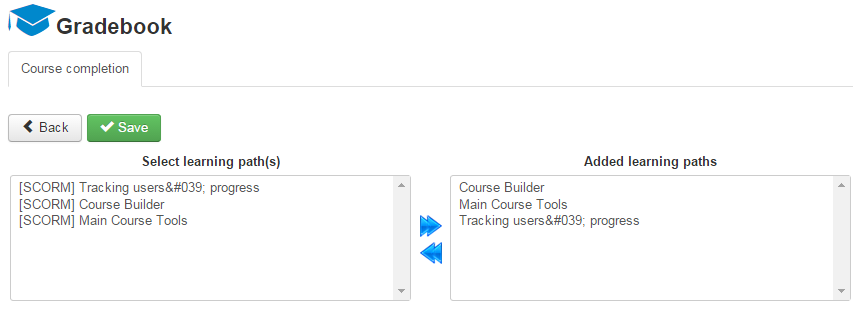
Fig. 'Configuring the Course Completion'
| 3. | Select a learning path or a SCORM package from the left box and click on ( ) icon to add it to the course completion configuration. Click Save () to save the changes. ) icon to add it to the course completion configuration. Click Save () to save the changes. |
If you want to delete an item from the course completion configuration:
| 1. | Enter the necessary course and click the Gradebook icon () in the left course menu. A list of course Students with their grades will appear. |
| 2. | At the top of the list click on the Configure > Course completion () to open the form. |
| 3. | Select the item you want to delete from the configuration in the right box and click on ( ) to move it to the left box. Click Save () to save the changes. ) to move it to the left box. Click Save () to save the changes. |
If you have any questions or suggestions regarding our help documentation, please post them to our ticket system.
|